Nintendo DSi XL to Gameboy Macro XLi
Intro
Modding has always been a hobby of mine. I thorough enjoy getting electronic devices to do things beyond what they were meant for. Recently I was feeling a bit nostalgic and decided to try my hand at taking a cheap Nintendo DSi XL that I bought from eBay and modifying it to become what some would call a Gameboy Macro XLi. The reason for writing this guide is because I’ve actually not seen too many guides on doing this. There is an abundant amount of information about modifying the older Nintendo DS Lite and DS phat but no centralized place for making the modification on the Nintendo DSi XL/LL. So here’s my attempt a very concise and quick guide on making one yourself. You might notice that there are different DSi XLs in the pictures, I did this over several weeks and modified different ones until I was happy with the way it turned out. As always, I’m not responsible if you brick your device or injure yourself in anyway, this was done as a hobby to potentially help anyone who might be looking for information. Please read through the entire guide before attempting this mod, it’s fairly involved and takes some tech know-how to accomplish.
Twilight Menu++ and Unlaunch
First thing before we start taking apart the DSi XL/LL is we need to do some software modding. Please note that you need to have completed the camera tutorial before attempting to go through this setup along with updating your DSi XL to the latest version. The reason why we want to install Twilight Menu++ is because the DSi XL/LL does not natively run GBA games and so we need to do some software modifications in order for the DSi to emulate GBA and DS games. Unlaunch will automatically boot the system into Twilight Menu++ whenever you power on your DSi XL/LL. There are multiple ways to go about getting this installed, for this guide I am doing the install through the SD card. I won’t go in depth into how to install this since there are a million guides to do so out there. This is what I used: DSi Guide and Unlaunch setup guide. Something to note here is that earlier this year there was a new release of nds-bootstrap that added the ability to swap screens from top to bottom, so if you are running a Gameboy Macro you should now also have the ability to play DS games along with your GBA games(DS games that don’t require a lot of use of the bottom screen work well. Some games like Pokemon Soul Silver for example does not work so well because you need to constantly swap screens every time a new screen loads). As the guide in the link mentions, if you’re using the latest version of Twilight Menu, more than likely the latest version of nds-bootstrap is included, but if it isn’t you can download the files here: NDS-bootstrap releases.
Quick and dirty setup
If you’re not in the mood to read through the guides and are fairly familiar with the CFW and Homebrew scene here are some steps to get your SD card prepped quickly for use:
Format your SD card to FAT32 with the allocation unit size set to 32kb
Download and install 7-Zip, WinRAR and other compression software don’t work with the Lazy DSi File Downloader
Download and run Lazy DSi file Downloader for whatever OS you’re computer is running, you might need to turn off your antivirus in order for this to run, it’ll show up as a virus/trojan
Go through the screens, select the correct version of your DSi firmware, Check all 3 boxes for TWiLight Menu++, dumpTool, Unlaunch. Select the SD card and press “Start”
Once done, click “Finish” and “Close”
Eject the SD card and reinsert into your DSi XL
Boot up DSi XL, start the camera app
Select the SD card, Select “ablum”
The screen should go purple and boot Twilight Menu++
Setting Up Twilight Menu++ as default boot without a top screen
My first attempt at this was setting up my DSi XL without a top screen, this is not recommended, but if you want to do it this way, it is possible. I will provide the steps below on how to try and navigate the menu without a top screen. Once you’ve followed the steps to boot into Twilight Menu++, you should be able to launch the “Unlaunch” app, this will bring you to a point where the menu is displayed on the top screen, but since we don’t have a top screen we will have to just press the buttons as follows to navigate:
Installing Unlaunch:
Press Down 3 times
Press A
Wait 10 seconds
Press the Power button
Set Unlaunch to boot Twilight Menu++ by default:
Press Down 2 times
Press A
Press Right 1 time
Press down 19 times
Press A
Press Down 7 times
Press A
Press the Power button
Now the DSi XL should reboot and start up in Twilight Menu++, please note that the steps above are under the assumption that you have your SD card setup similar to mine, if that’s not the case you might need to try something else. Leave a comment and I can try to help if needed.
Disassembling the Nintendo DSi XL/LL
This is another piece of the guide that has already been well documented out by iFixit. The process is pretty involved and you end up taking apart the entire DSi XL/LL. This is a great opportunity to clean the device and components or replace the housing. In my case, I replaced the bottom touch screen digitizer with a new one and also ended up replacing the housing with a white one.
Our goal here is to do these things:
Seperate the top screen and bottom screen into two
Recover the speakers from the top half of the DSi XL
Remove the motherboard from the housing so we can solder the necessary wires
Housing modifications
You will want to make a few modifications to the housing in order to fit the speakers in the housing. This isn’t too much work and can easily be done with flush cutters or a small chisel. You will also can modify the stylus holder like I did in the pictures below. You can just take off the stylus holder but I’ve found that it causes a lot of flex when you push on the buttons really hard without it’s support.


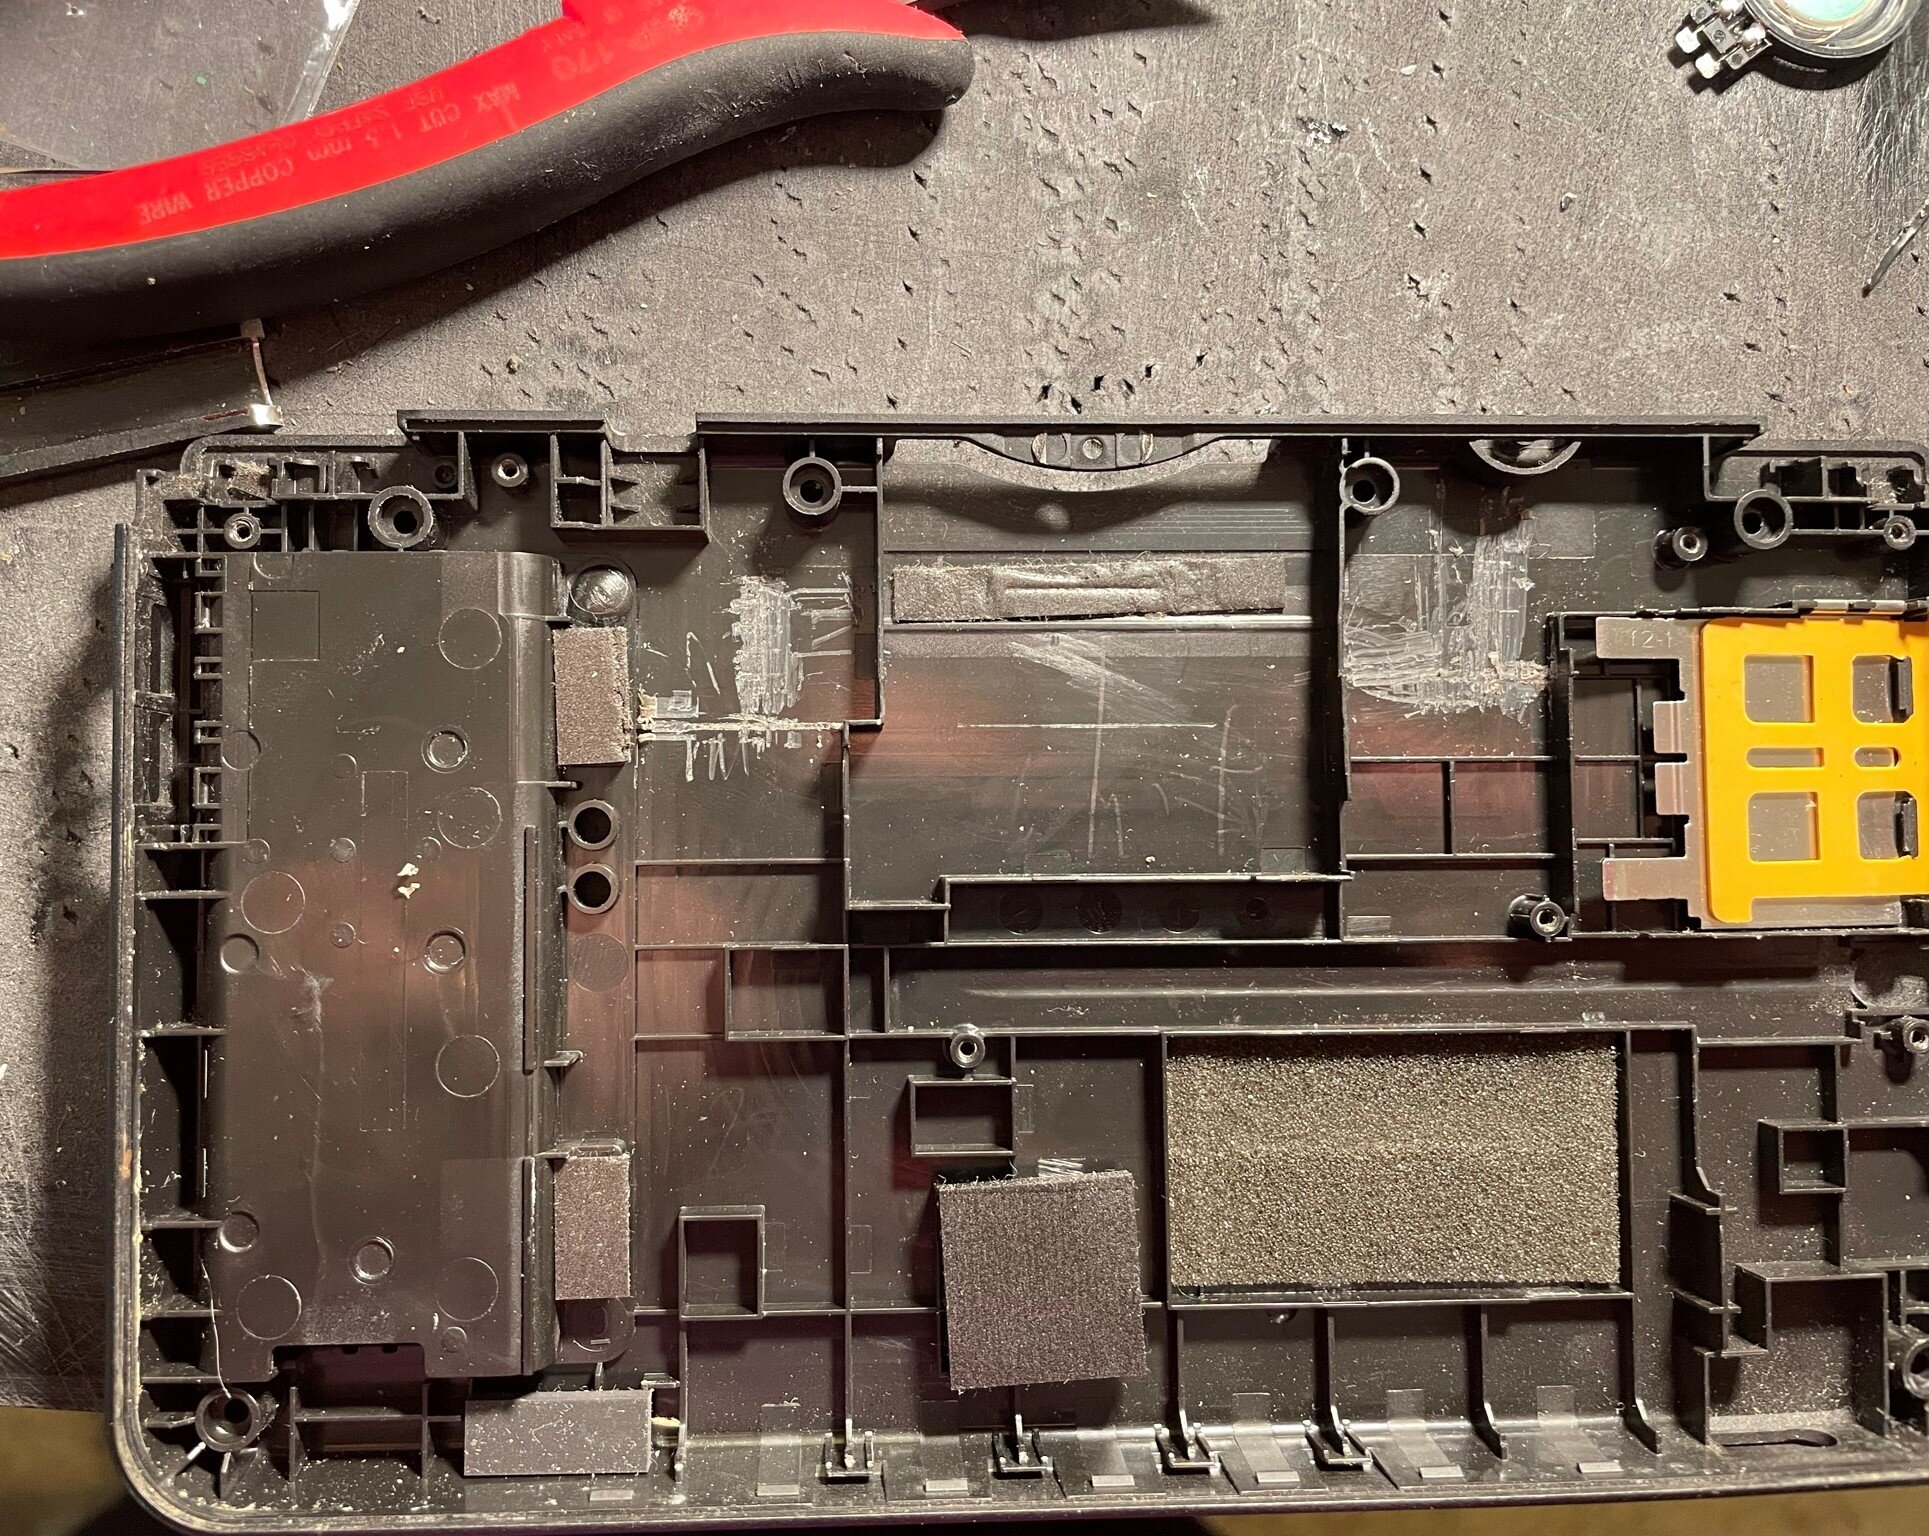
You will also want to use a 1/4” drill bit or some other tool to widen the holes where the hinge use to be. I do this in order to fit a 1/4” acrylic rod that is about 5” long. This will be what is used as the light bar. Some people don’t like it, but I’ve not been very bothered by it at all. I actually think it adds a really cool aesthetic to the Gameboy Macro XLi, and the brightness is adjusted based on how bright your screen is.
Tools and Material
There are quite a few things needed for this project and I would not recommend doing this mod if you don’t know how to solder or work with small electronics and parts. Here is a list of tools and materials that I used to modify my DSi XL. Some of the links to Amazon are affiliated and I get a small commission from them, this helps me keep this website up and provide new content.
Isolating and soldering the motherboard
If you have followed the instructions provided by iFixit, you should now have the motherboard separated from the housing. The guide may have mentioned this, but always be careful when handling the ribbons, some are very small and can easily rip, the ribbon holders are also very easily broken if you use too much force. This is where the pry tools and tweezers I linked above come in handy. I never use sharp tweezers because of the fact that I’ve ruined too many ribbons with them, the T-shaped tweezers are a bit nicer and work better for me in this application.
The solder points are very small, and require very thin wires, I really like the BNTECHGO brand of silicone wires, so for this guide I used the 30AWG wire. One of the solder points for bypassing the top LCD is a through hole so twisting the stranded wires and soldering through makes this not too difficult. For the other solder points, I highly recommend using some flux to help get the solder to stick on the pads
I recommend soldering the bypass points first and then the speakers. For my use I soldered an LED and resistor but you can technically just solder a SMD resistor if you don’t want an LED. The wires for the LED and resistor don’t need to be very long, maybe about 1 inch or so. There are different ways of soldering the resistor and LED. On my DSi XL, I soldered the resistor on the left pad and I had the LED anode leg on the right pcb pad. If you have heat shrink tubing, I would recommend using some to keep these wires from shorting out since the LED and diode are fairly exposed, not necessary but it helps to keep things nice and tidy.

The next steps would be to solder the speakers, again flux is your friend here. dab some on the pcb pads and solder the wires to the motherboard, I believe in measuring twice and cutting once, so for these wires I started with about about 8 inches of wire and cut to the right size after putting everything in place and testing. Solder the positive and negative wires for the speakers like the pictures.

Taping, organizing, and routing cables
The nice thing about the DSi XL housing is that there is quite a bit of room to route wires, especially where we are doing the bulk of the work. This area is where the top screen connects to the bottom screen so we have room to bundle the wires and keep them in one place. I do this by using some kapton tape to hold down all the wires. Routing the wires take some time to get done well so that you’re not pinching anything and the DSi XL doesn’t bulk unnecessarily. Play around with moving the wires until you’re at a point where it doesn’t feel like anything is being pinched and there isn’t so much bulk that closing up the case is difficult. Using a hot glue gun to keep the speakers in place is another option and probably a lot easier to do. If you have a hot glue gun, I’d highly recommend doing it this way instead. With the housing drilled out using a 1/4” drill bit you have a good amount of room to stuff your resistor and LED in. Be sure that your solder joints are solid and you should be able to bend the LED legs and stuff the wires into the little pocket where the ribbon wires for the top screen use to exist.


Assemble and boot up
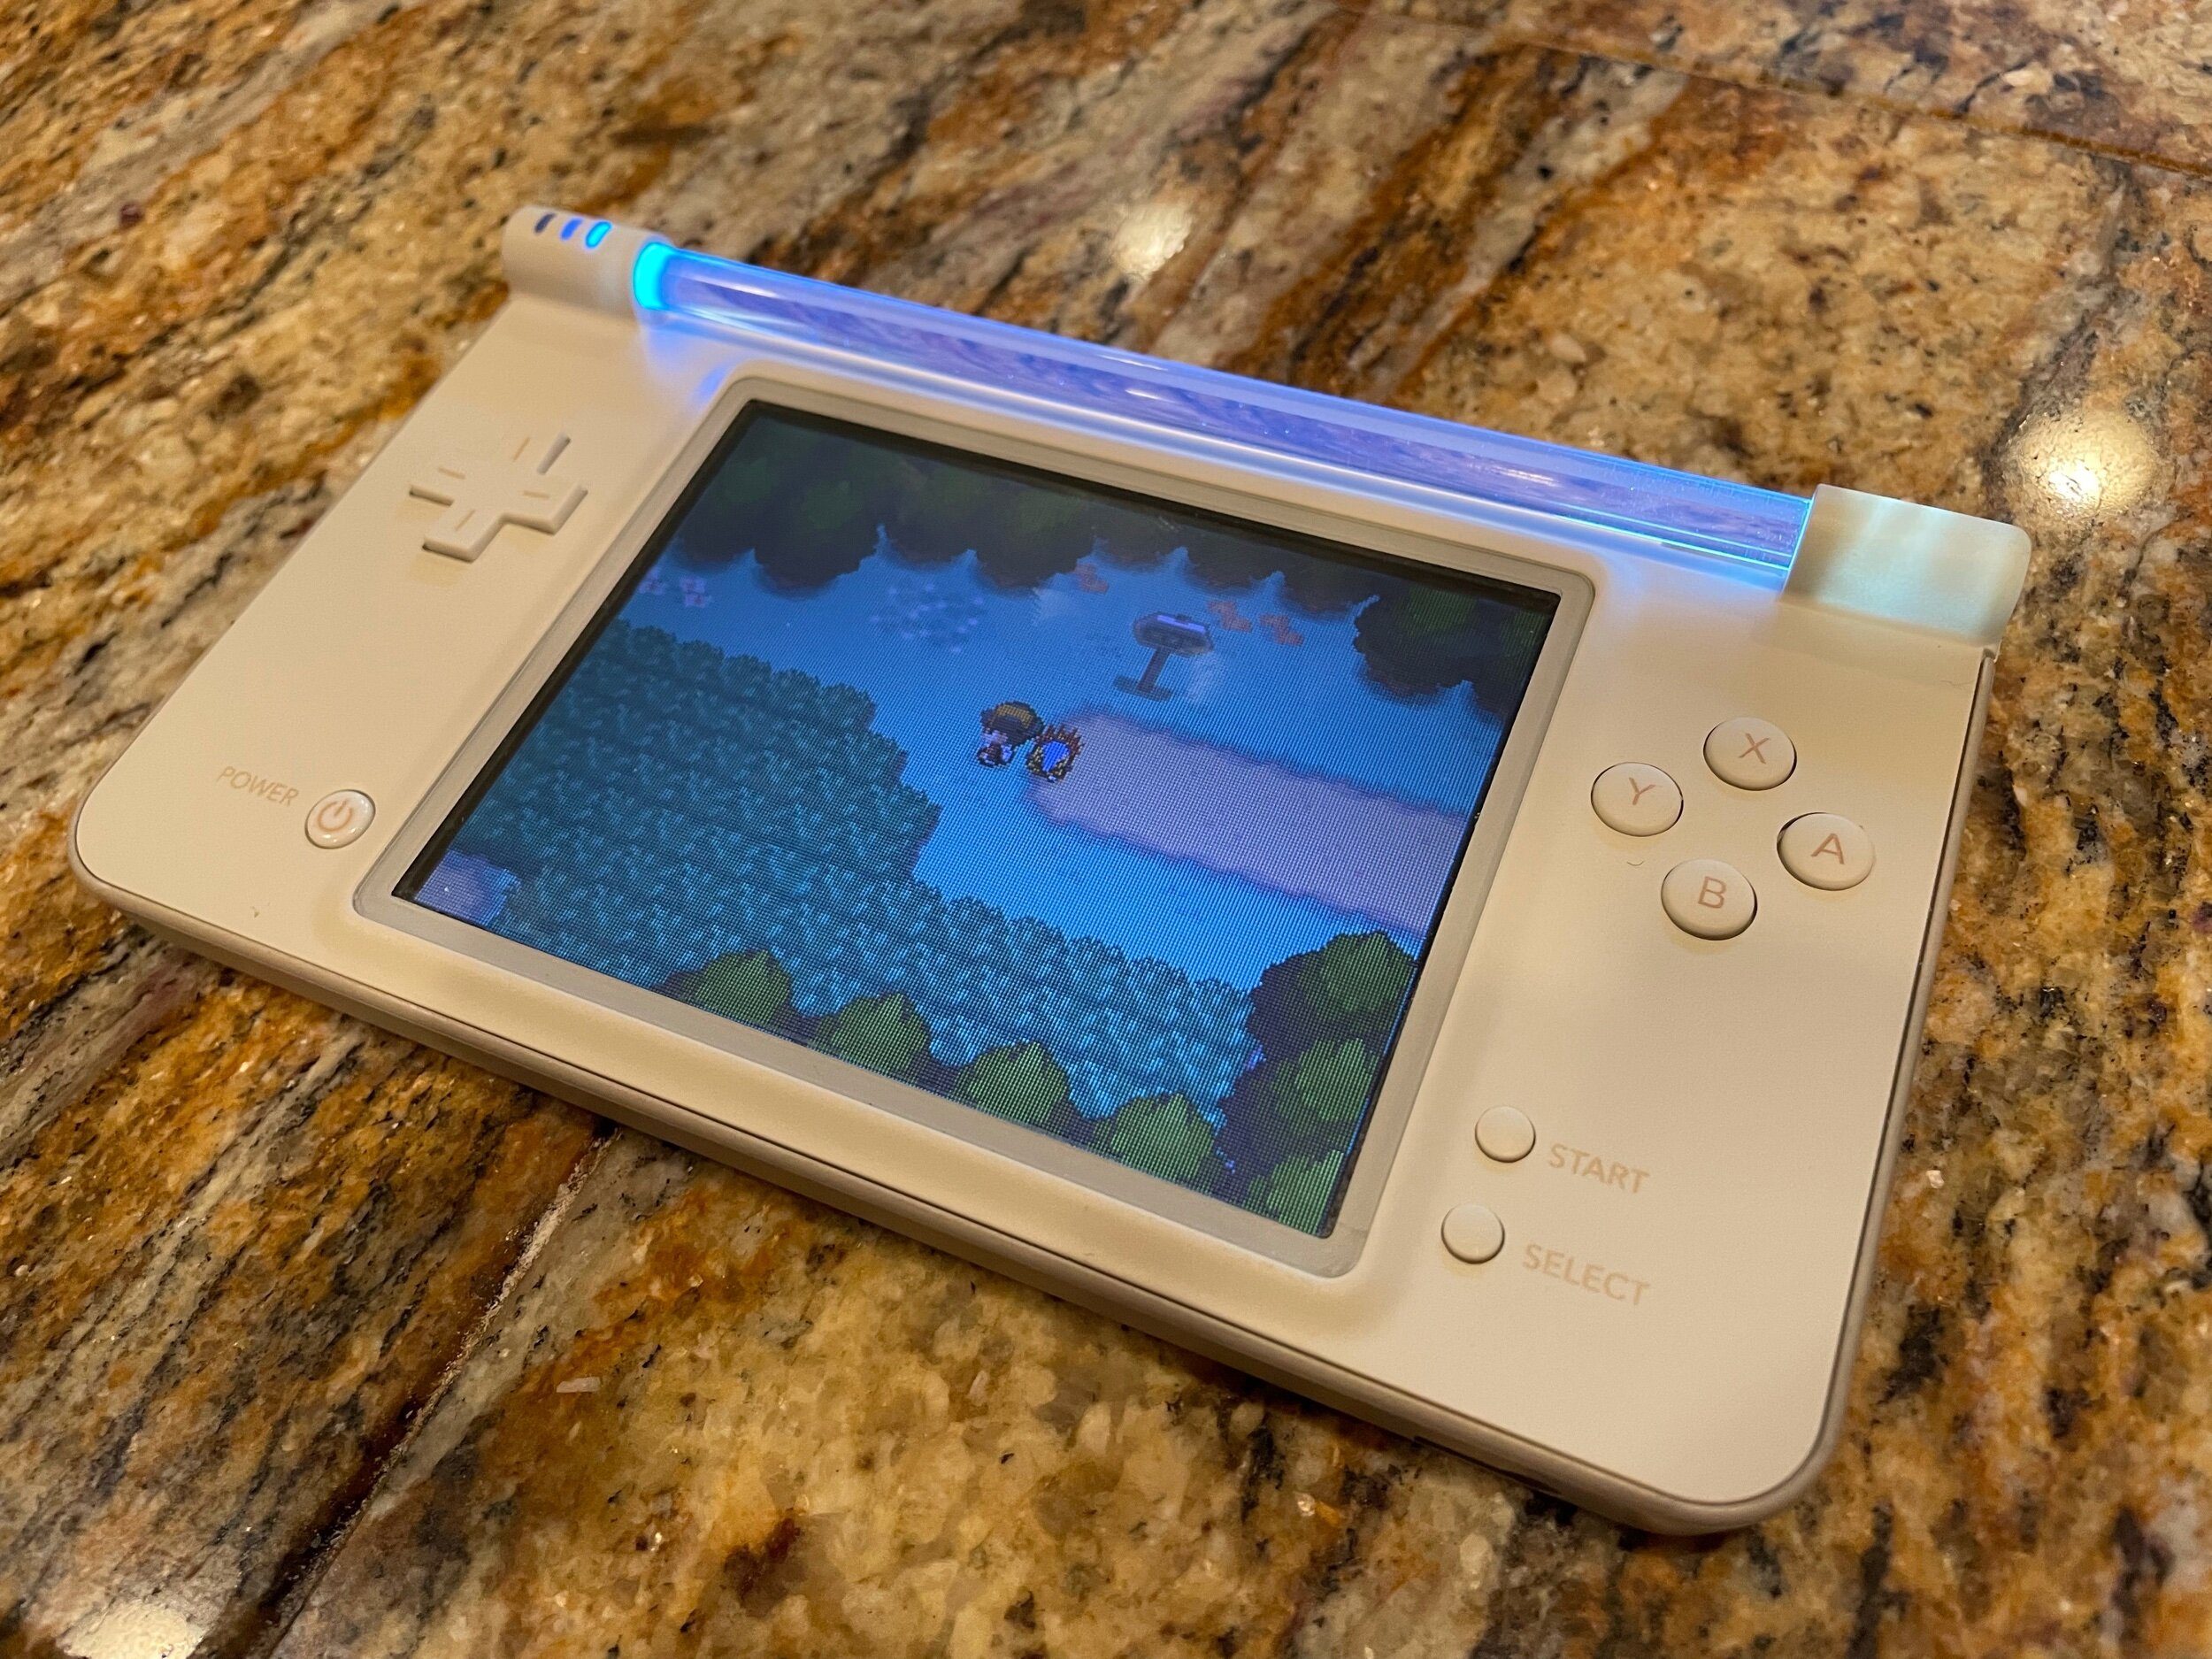
If everything is assembled correctly and screwed in place you should be able to boot up your brand new Gameboy Macro XLi, The LEDs will light up and you should be greeted with a “Touch the touch screen to continue” message. You now have a portable gaming system that can run all of the classic consoles up to NDS games, I mainly use mine to play Gameboy and Gameboy Advance games but do as you please. This was a bit of a tedious project, but well worth it if you’re interested in something that can emulate and play older games and had a broken DSi XL around. These steps can also be followed for the regular DS and DSi as well, the most important portion of this entire process is finding the pads that you need to add a resistor to in order to trick the DS Phat/DS/DSi/DSi XL into thinking that the top screen is still attached. This project can literally be done in a day if you have some technical know how and have all the tools you need available at your disposal. I had to order a new shell a long with getting a new digitizer to replace the once that it came with but all in all it wasn’t much work nor did it cost very much.
Conclusion
I’ve tested out the GB/C, GBA, and SNES emulator so far, all work great and I don’t see any lags or weirdness with the games. I did try playing a few DS games as well but my issue with that is most games are setup to utilize both screens so you’ll have to do a lot of swapping screens when you play, I’m not a fan of that but you do have the option to play DS games if you desire to. The speakers also sound great even though they’re in the back, they aren’t too quiet or muffled and the screen looks amazing. If this were not a broken DSi, I probably would have kept it as is since you are able to play on emulators without sacrificing the top screen and you would still be able to effectively play Nintendo DS games. You don’t gain much if you’re destroying a perfectly good DSi XL to make one of these. So my suggestion is if you want to do this project, but a cheap DSi XL from Japan or find one that has a broken hinge or top screen and use that. Hopefully this guide was helpful and concise enough that anyone interested in making a Gameboy Macro XLi can do so. If this guide has helped you and you’d like to support me, you can buy me a cup of coffee or a pint via the Donate button below. Cheers.