
DIY Lawn Lute/ Levelawn
Introduction
I started my journey into lawn care recently and by no means am I an expert or pro. My backyard is literally 350 sq ft so there isn’t much to care for. I’ve been watching a lot of videos on Youtube by guys like Ryan Knorr, Connor Ward, Lawn Ginja, etc. I’ve been amazed by the amount of work they put into their lawns and just how lush and green they are. I know that those goals are probably not going to be achievable quickly but I’m trying to soak up as much knowledge as I can at the moment. I’ve bought different tools and equipment to help me on this journey and as always I came across a few tools that I didn’t feel like were completely necessary and/or way over priced. One of those tools is the Levelawn or Lawn Lute, essentially a flat tool that is used to help push and level top dressing.
The cheapest one lawn leveling rake I found on Amazon was around $55.99 and is only 16.5” x 12.2” with a 5’ handle. The next size up is 30” x 10 1/4” and costs $132 + shipping, which to me is ridiculous. After looking around Reddit and a few other websites I realized that this rake was literally C channels and angles welded together. After doing some crude drawings and searching online I was able to find a shop that sold almost everything I needed to make my own lawn leveling rake that was 24” x 12” for around $50. I decided to make my rake out of aluminum instead of stainless steel due to the fact that I am not a welder, it costs way more, and drilling through steel is a lot more difficult and making a mistake can be costly. The thickness I decided to go with was 0.062” which I felt was sturdy enough and didn’t have much give at all. I went with aluminum channels that were only 0.5” at the base with 0.5” legs. If I could redo it, I would probably go with aluminum channels with a 1” base and 1” legs. The reason being that the holes needed are almost too big and it makes the 0.5” aluminum feel a little thin. The most difficult thing to find was a swiveling hinge to attach the rake and handle to. I eventually found something that worked and it works well.
Supplies
I purchased all my aluminum pieces from onlinemetals.com, the cost came out to about $30. I’m sure if you go to a local home improvement store it would be cheaper but you’ll have to cut the pieces to the correct length, I didn’t have the right tools to make the cuts at the time. The easiest thing to do is to go to onlinemetals.com, copy and paste the part numbers into the search bar and select the lengths I listed below. I’m including the parts for the 1” as I think it’d be a better size. Note that you really only need 3 aluminum channels for my build, but it’s a good idea to have a spare on hand or if you want to have 4 channels on your rake:
Parts for rake head:
4 x 24” x 1" x 1" x 0.062" Aluminum Channel 6063-T52 Extruded Architectural - Part #: 20189
2 x 12” x 1" x 1" x 0.062" Aluminum Angle 6063-T52 - Part #: 17856
2 x 24” x 1" x 1" x 0.062" Aluminum Angle 6063-T52 - Part #: 17856
Other Parts:
10 x M5 flat washers & lock washers
2 x M8 flat washers & lock washers
Tools:
Assembling the frame
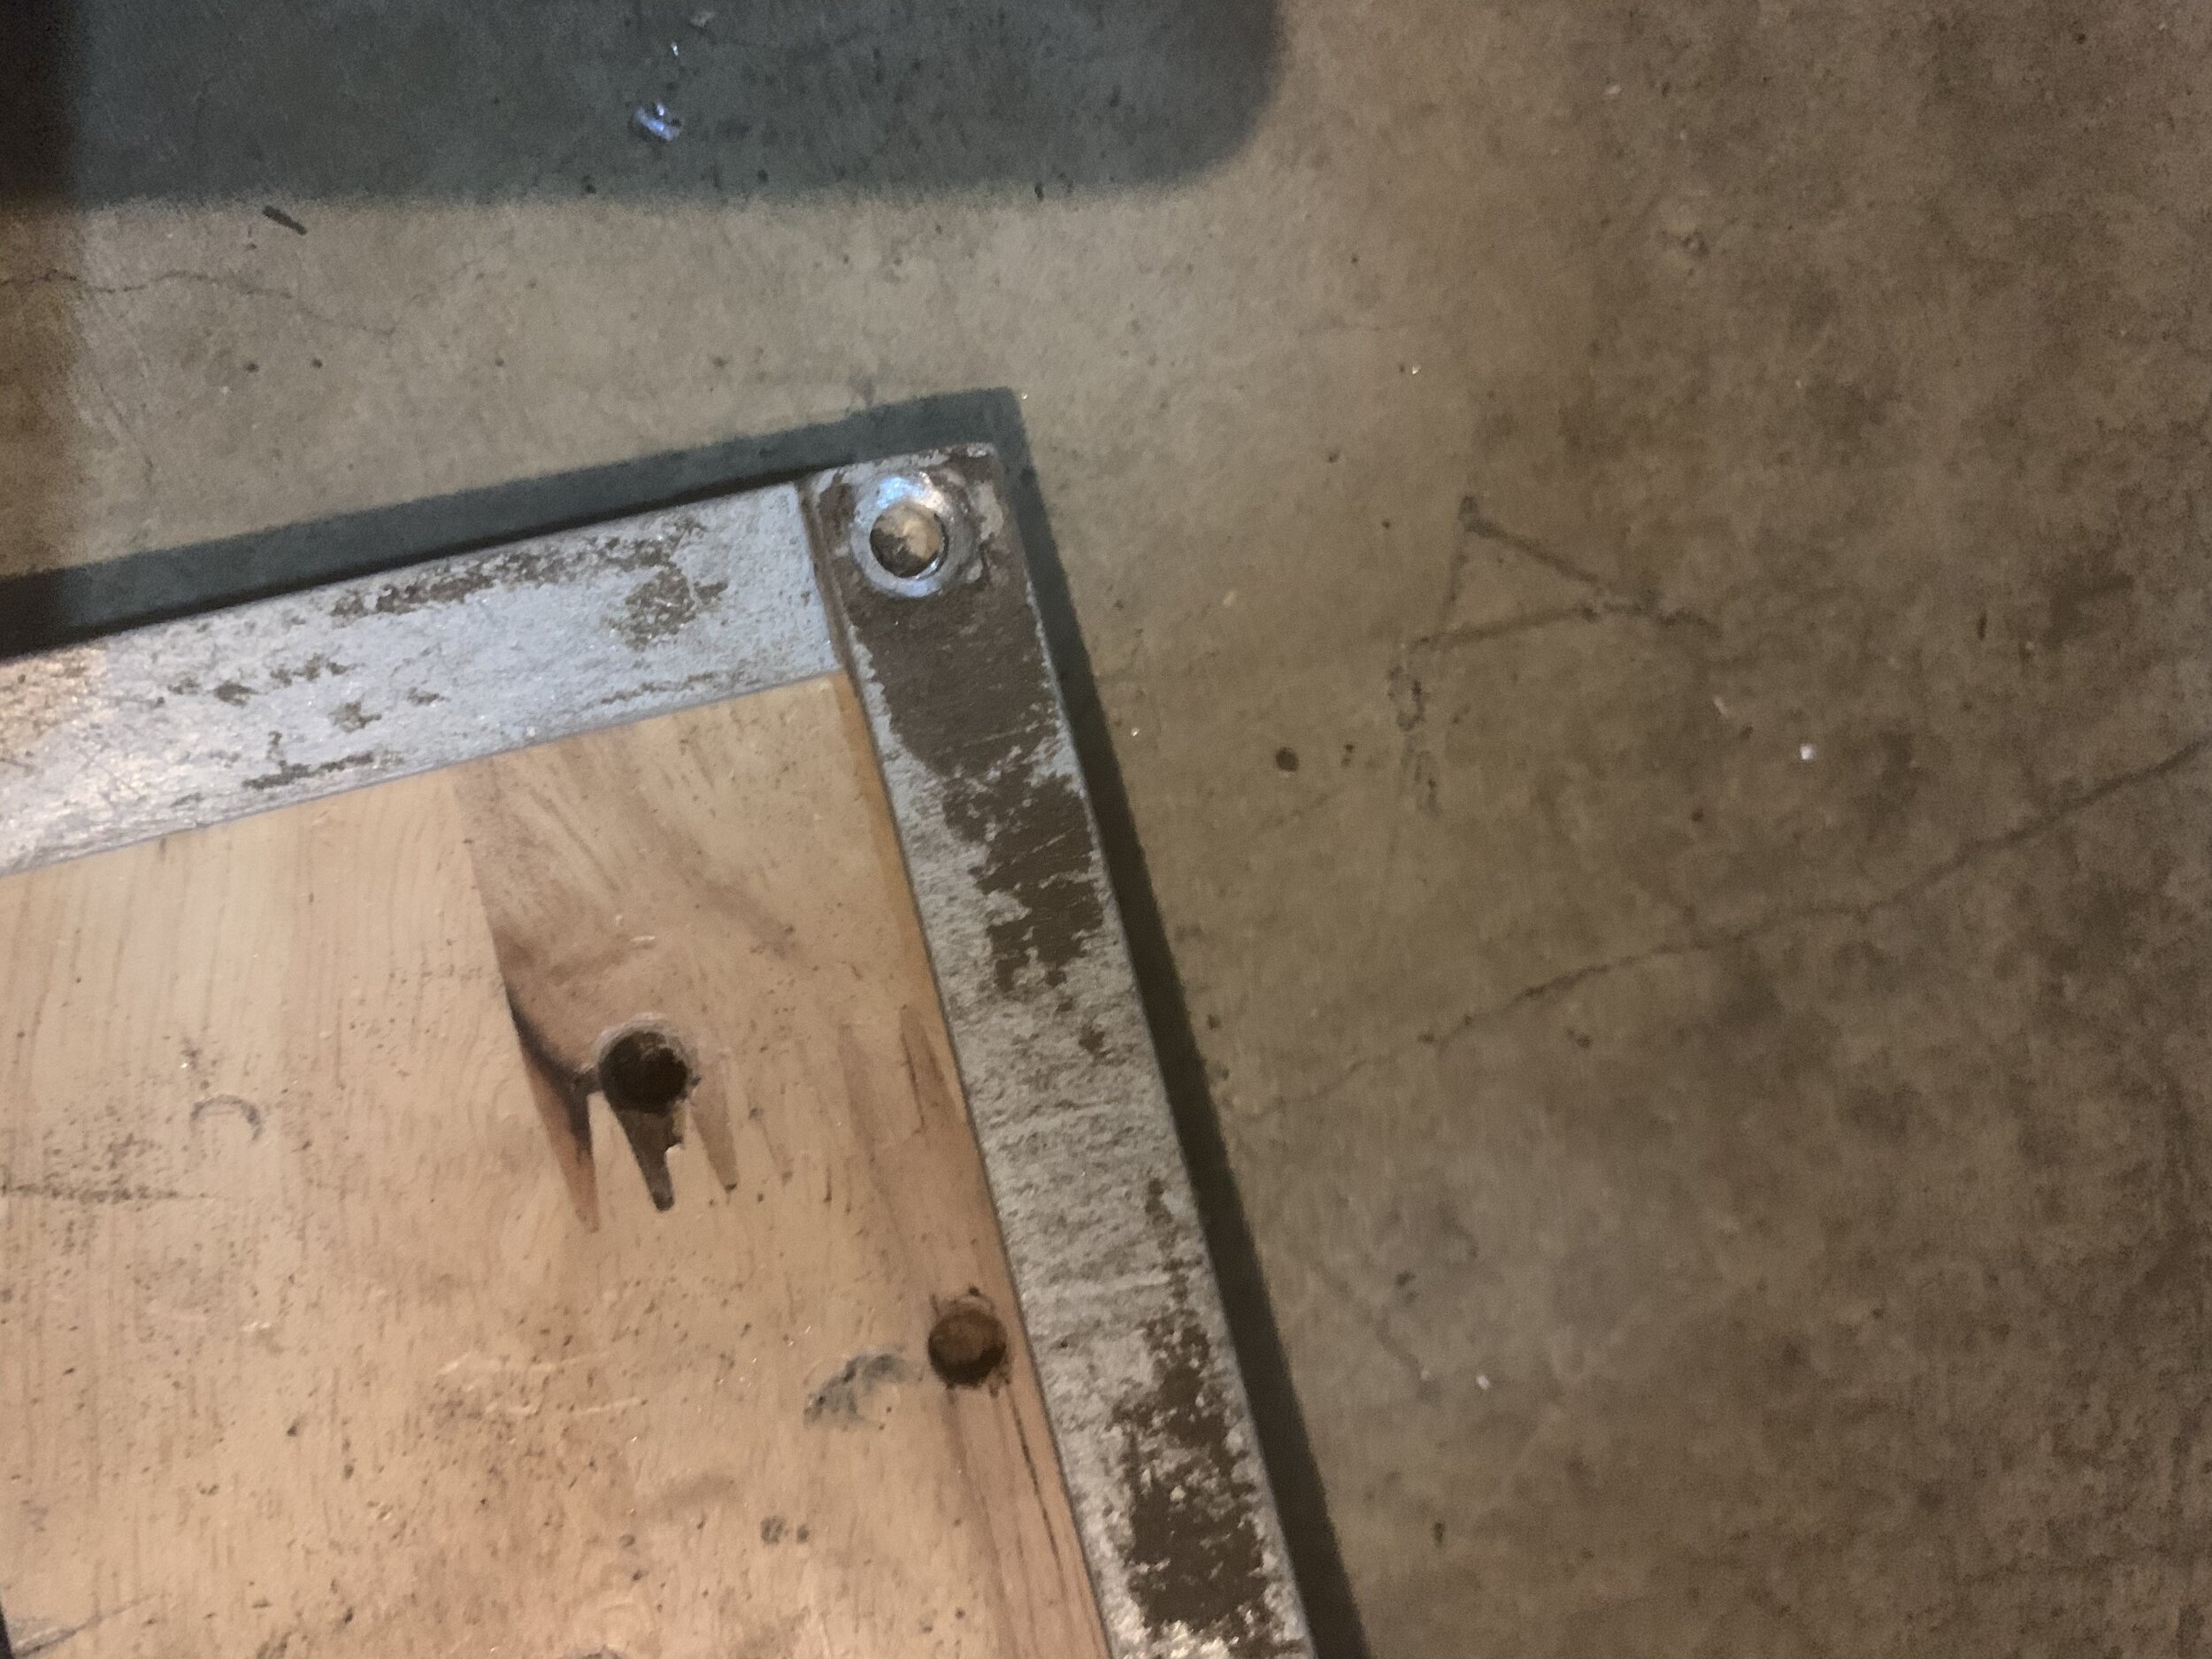
The first thing you want to do is drill M8 holes in the aluminum angles, the reason for M8 holes instead of M5 holes is due to the fact that counter sunk bolts don't sit very flush with 5mm holes. After some testing I realized that with M8 holes the bolts sit almost. completely flush against the frame which is what you want. For this process I used a piece of scrap wood and laid down my aluminum in a right angle, from there I did my best to hold the two pieces down and slow drill until I hit the wood. On my build have the 24" piece on top of the 12" piece. It is important to remember which piece is on top and which is on the bottom so you won't have misaligned holes. Drill the holes on all 4 corners and insert the M5x20mm bolts in from the bottom and add the lock washer, washer, and nut on top. Tighten the bolt down as much as you can with an impact driver or ratchet with the hex bit. Once the frame has been assembled try your best to make sure it's squared, I used the same piece of wood to check for squareness. I forgot to take pictures while I was going through this process so I went back and took pictures later, but they should give you an idea of what needs to be done.
Assembling the Channels
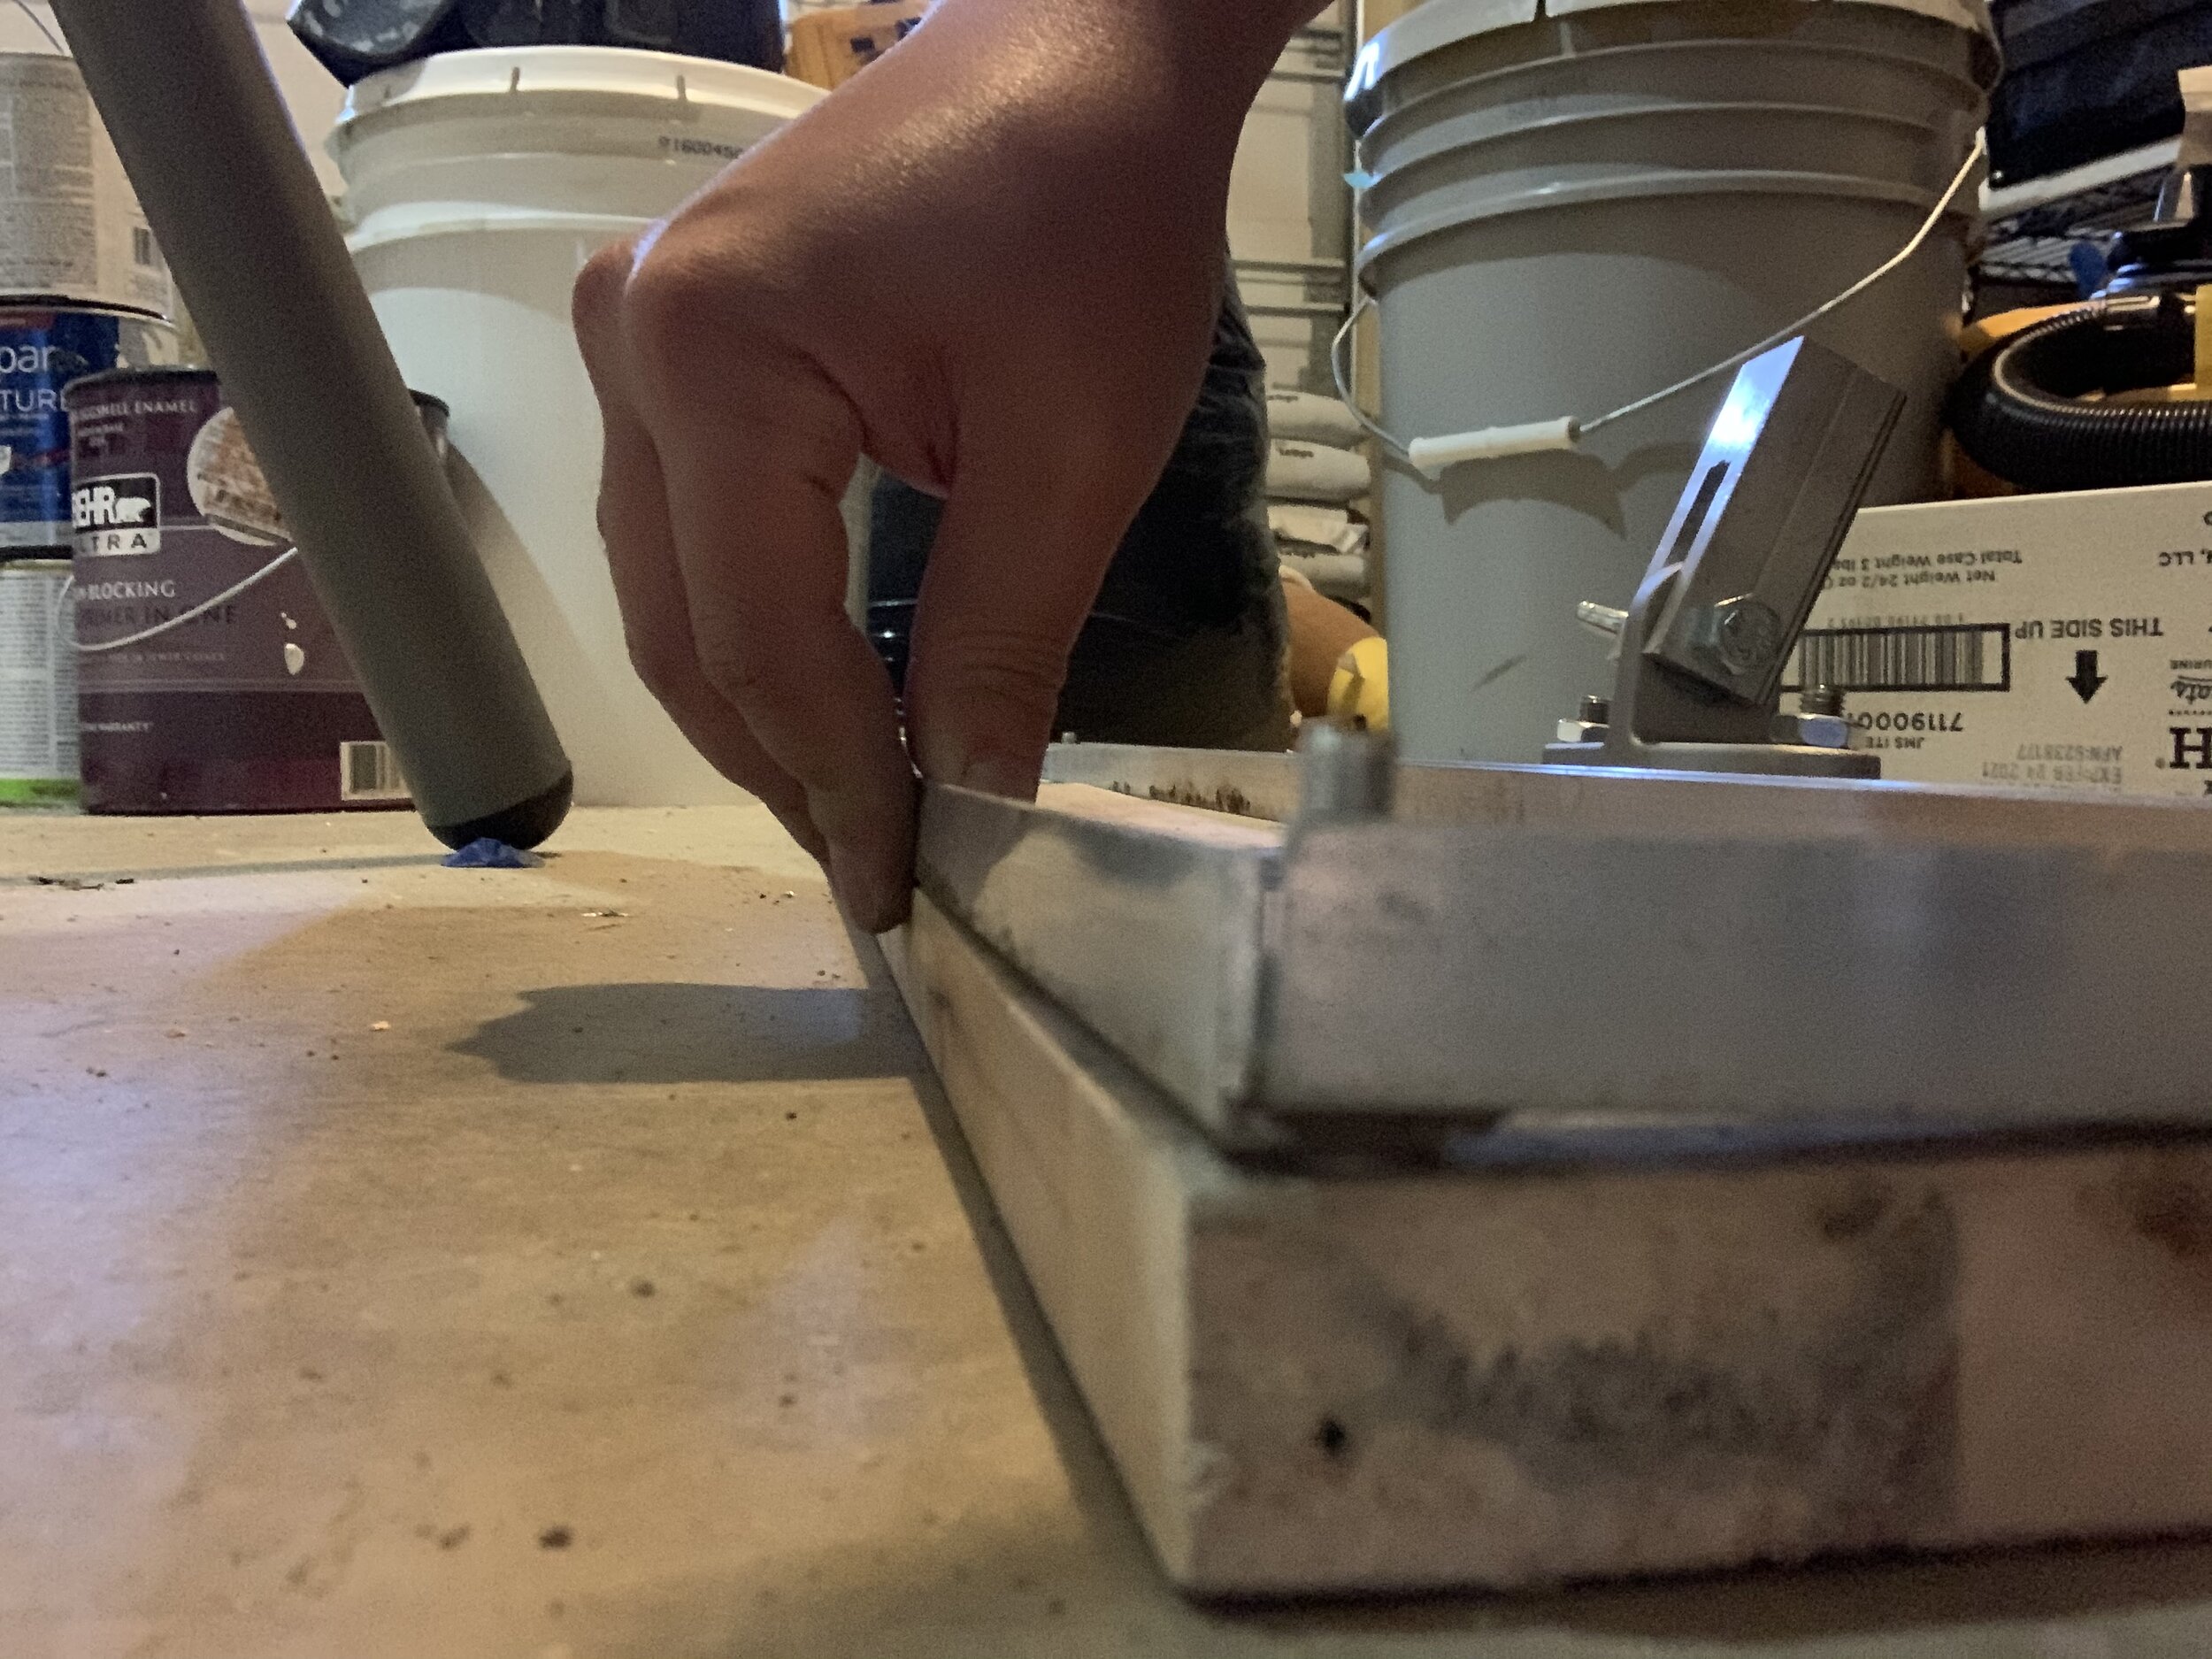
This step takes some measuring but you can also do your best to eyeball it. The first aluminum channel I put in was the middle one, from there I did my best to place the other two in equal distance from the angle and middle channel. You only get one chance at drilling so please make sure that your channels are aligned properly. When placing the channels in the frame it might feel like a tight fit. To drill the holes, I again place the frame with the channels on top of the piece of scrap wood and did my best to drill and keep the channel in place and from moving around. These holes will also be M8, once you've drilled all the holes repeat the process of inserting the M5 bolts from the bottom, and lock washer, washer, and nut from the top and then tighten using the impact driver and hex bit.

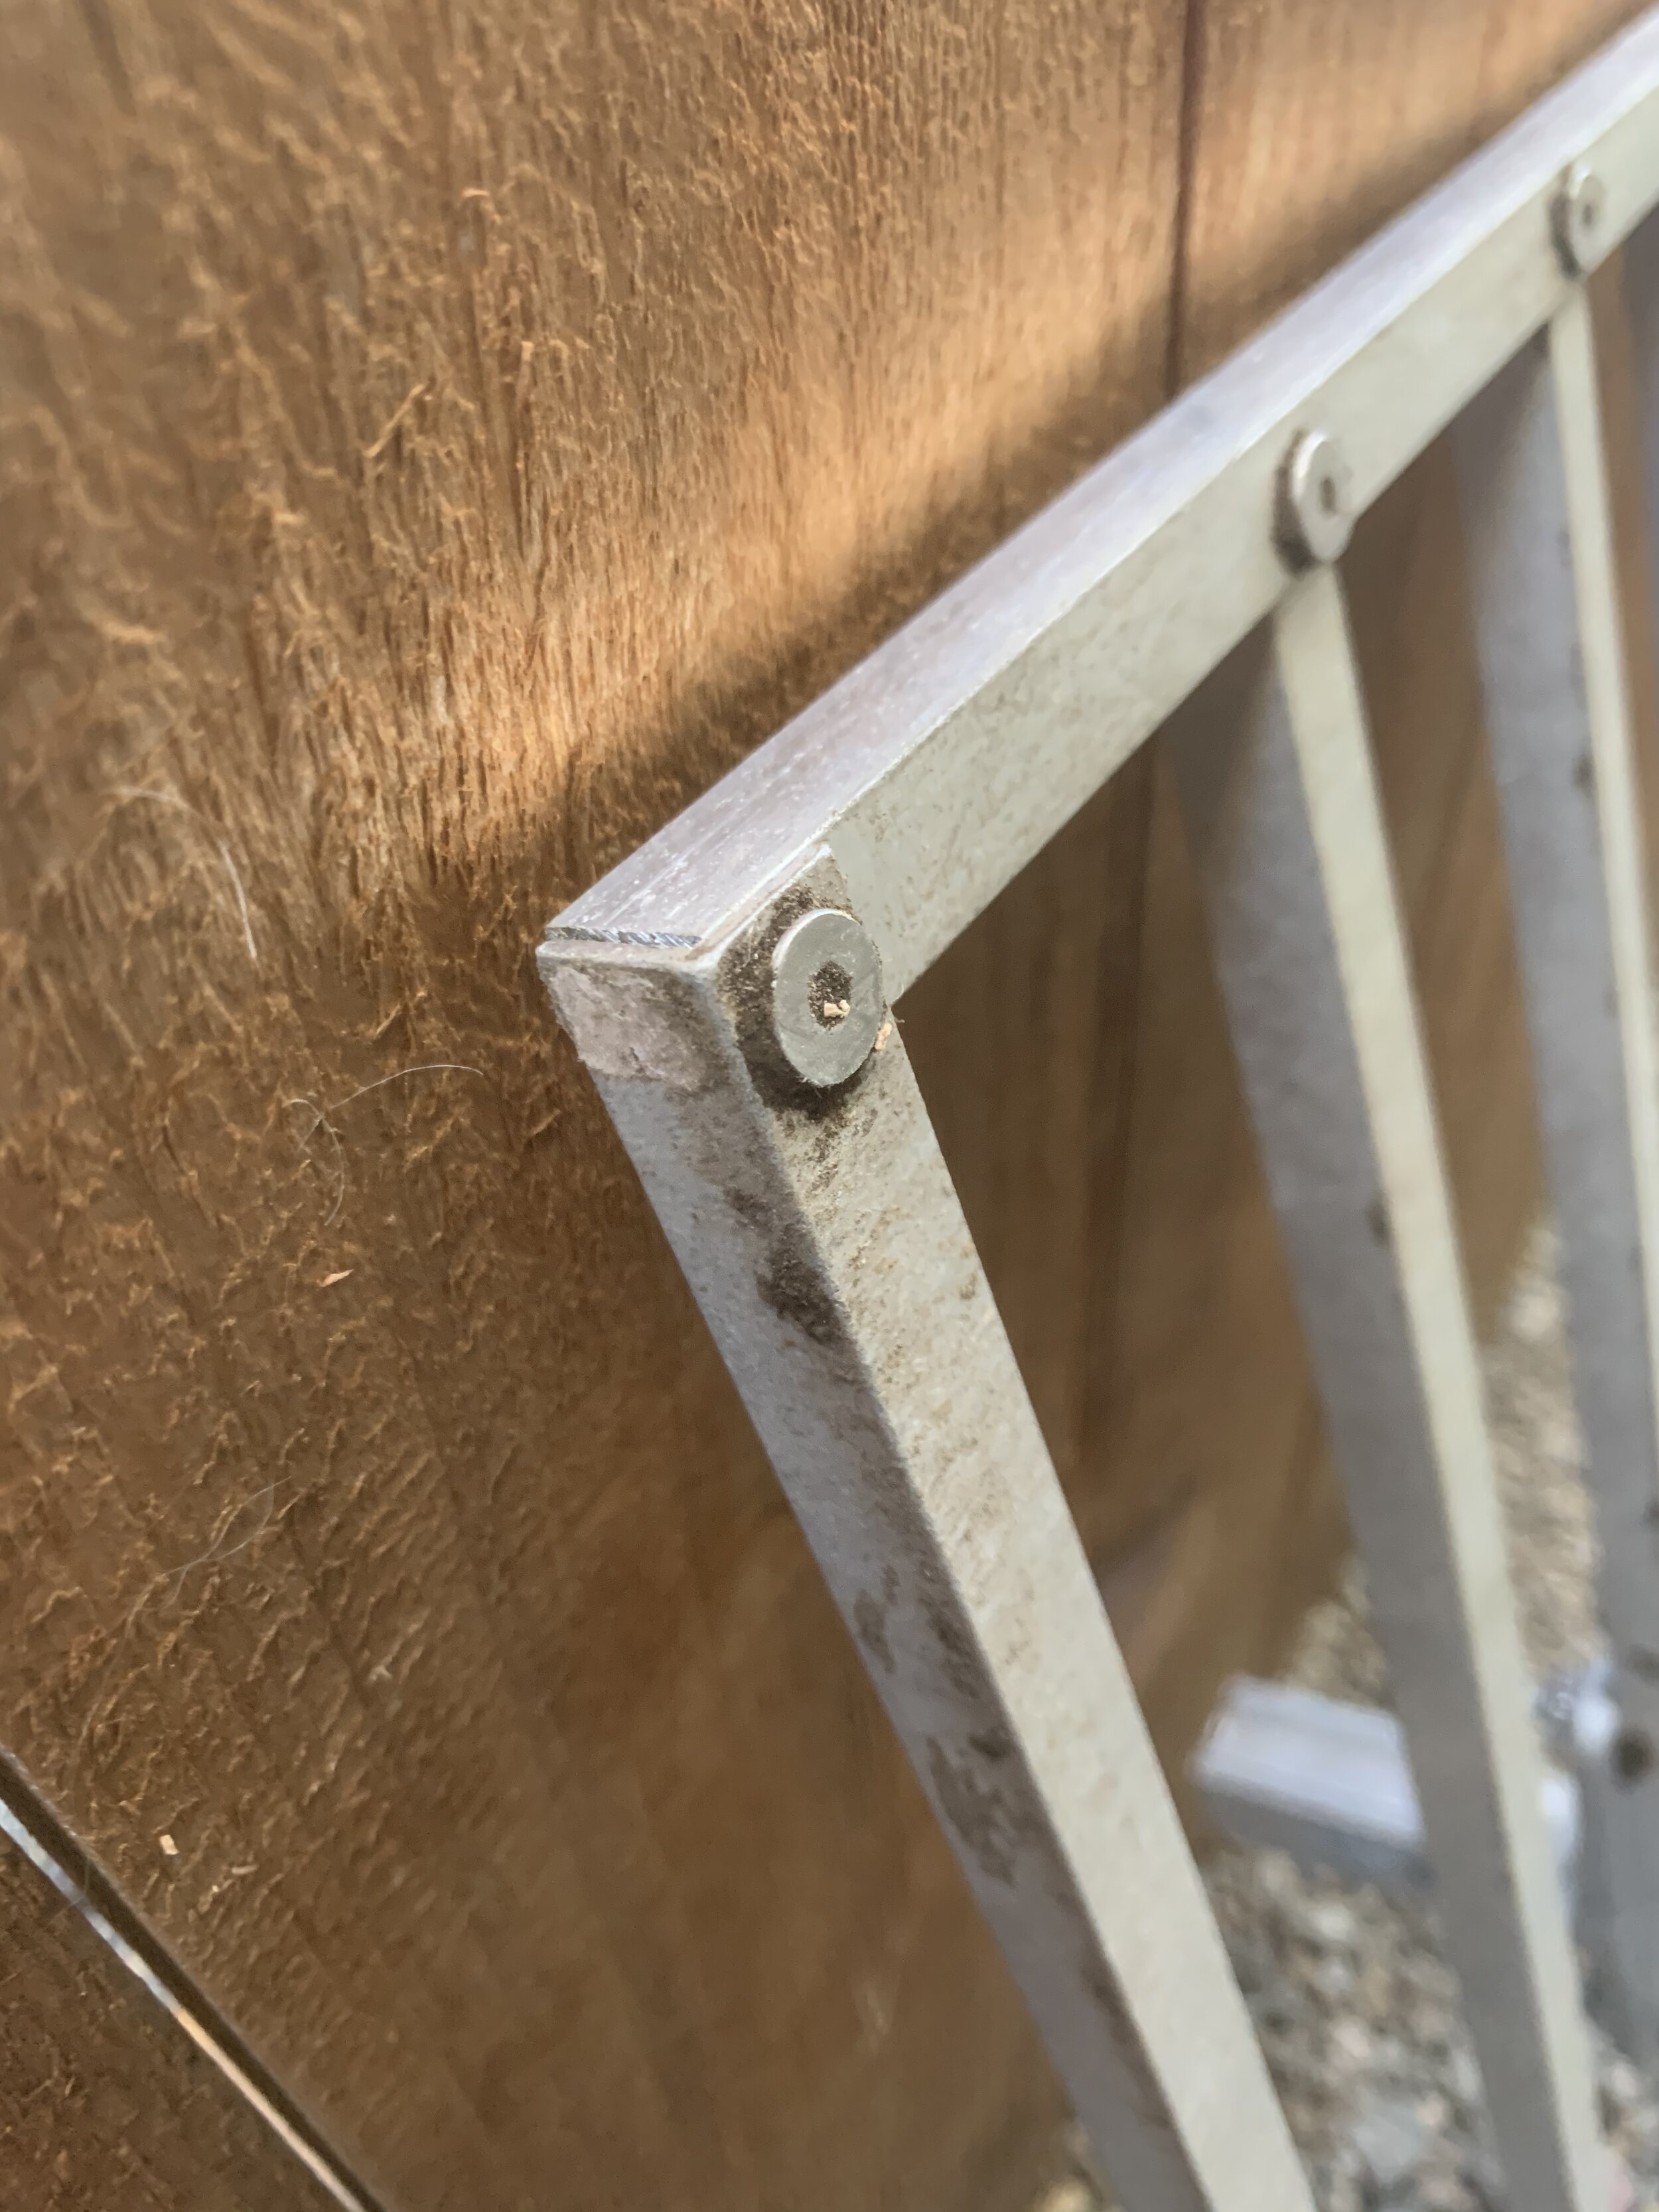
Aligning and Installing the Bracket With Broom Adapter
For this step you'll want to find the center of the middle channel, place the bracket on top and drill holes using the 5mm drill bit first to create pilot holes. Again, I do this on top a piece of scrap wood and drill slowly while holding everything in place and making sure nothing moves. Once the M8 pilot holes have been drilled you can make the holes bigger with the M10 drill bit. After the two holes have been increased, insert the M8 bolts from the bottom, place the bracket over them and the usual: lock washer, washer, and nut. Then tighten the bolts down with the impact driver using the hex bit.
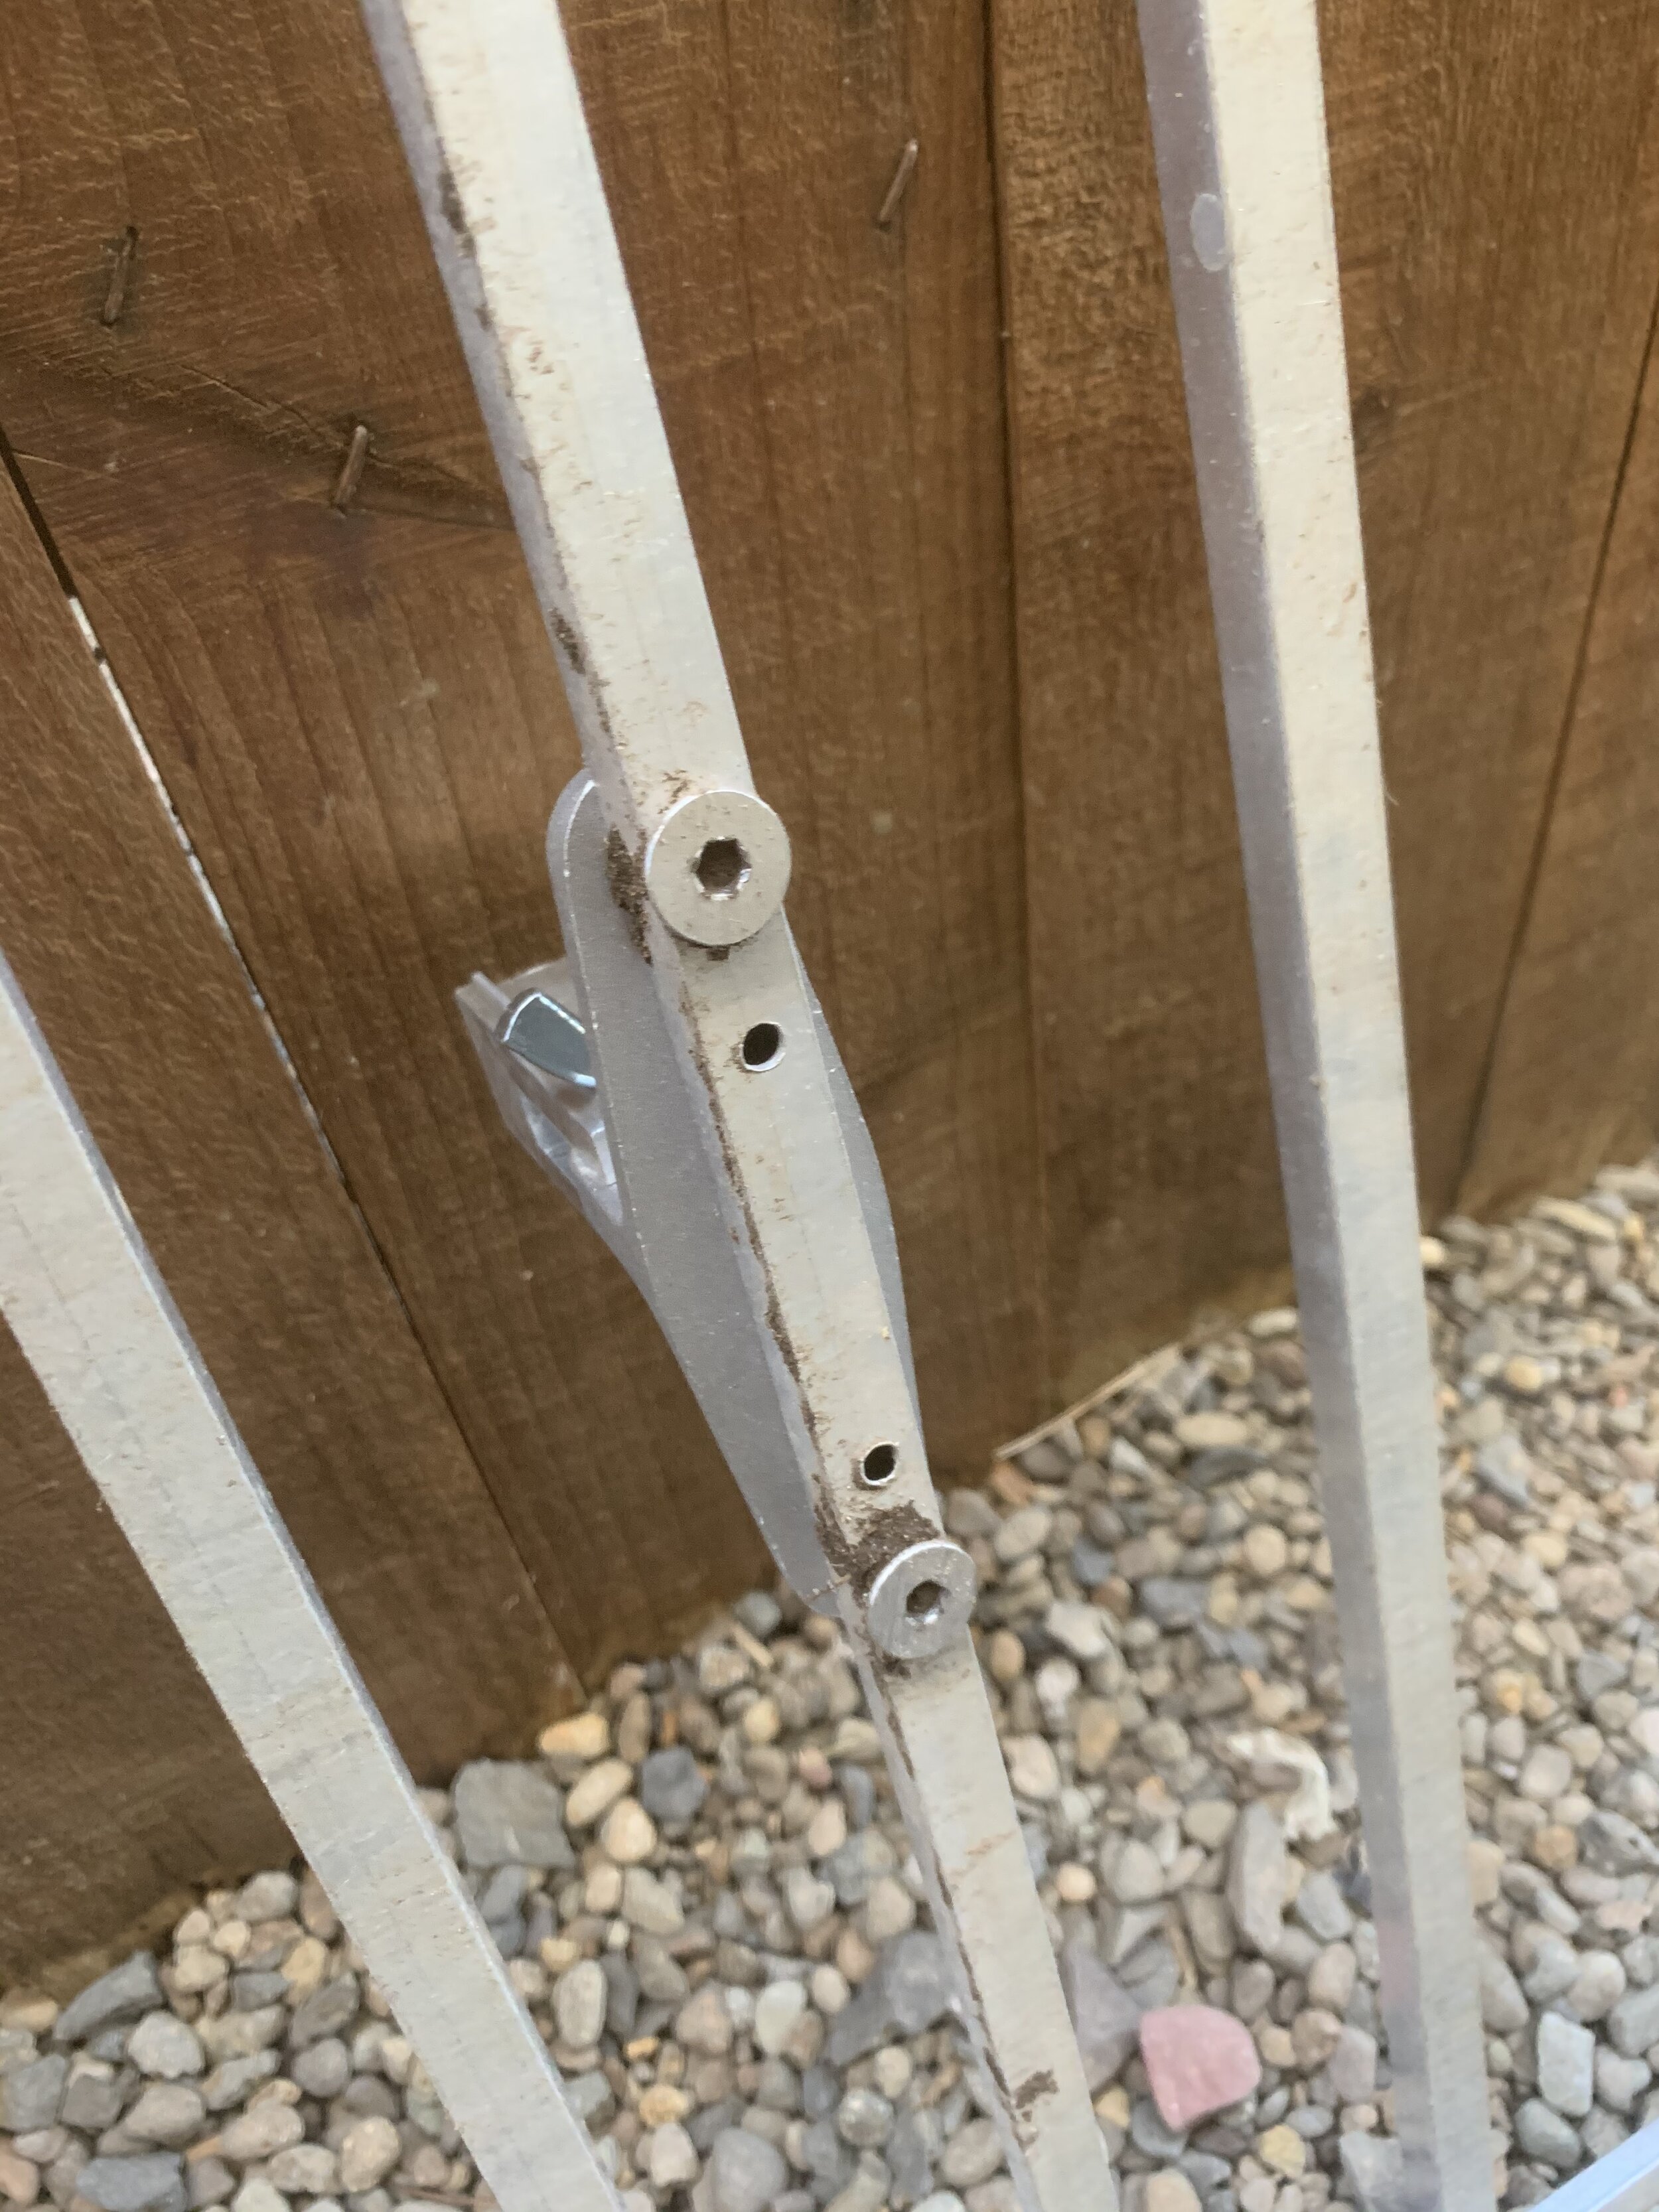
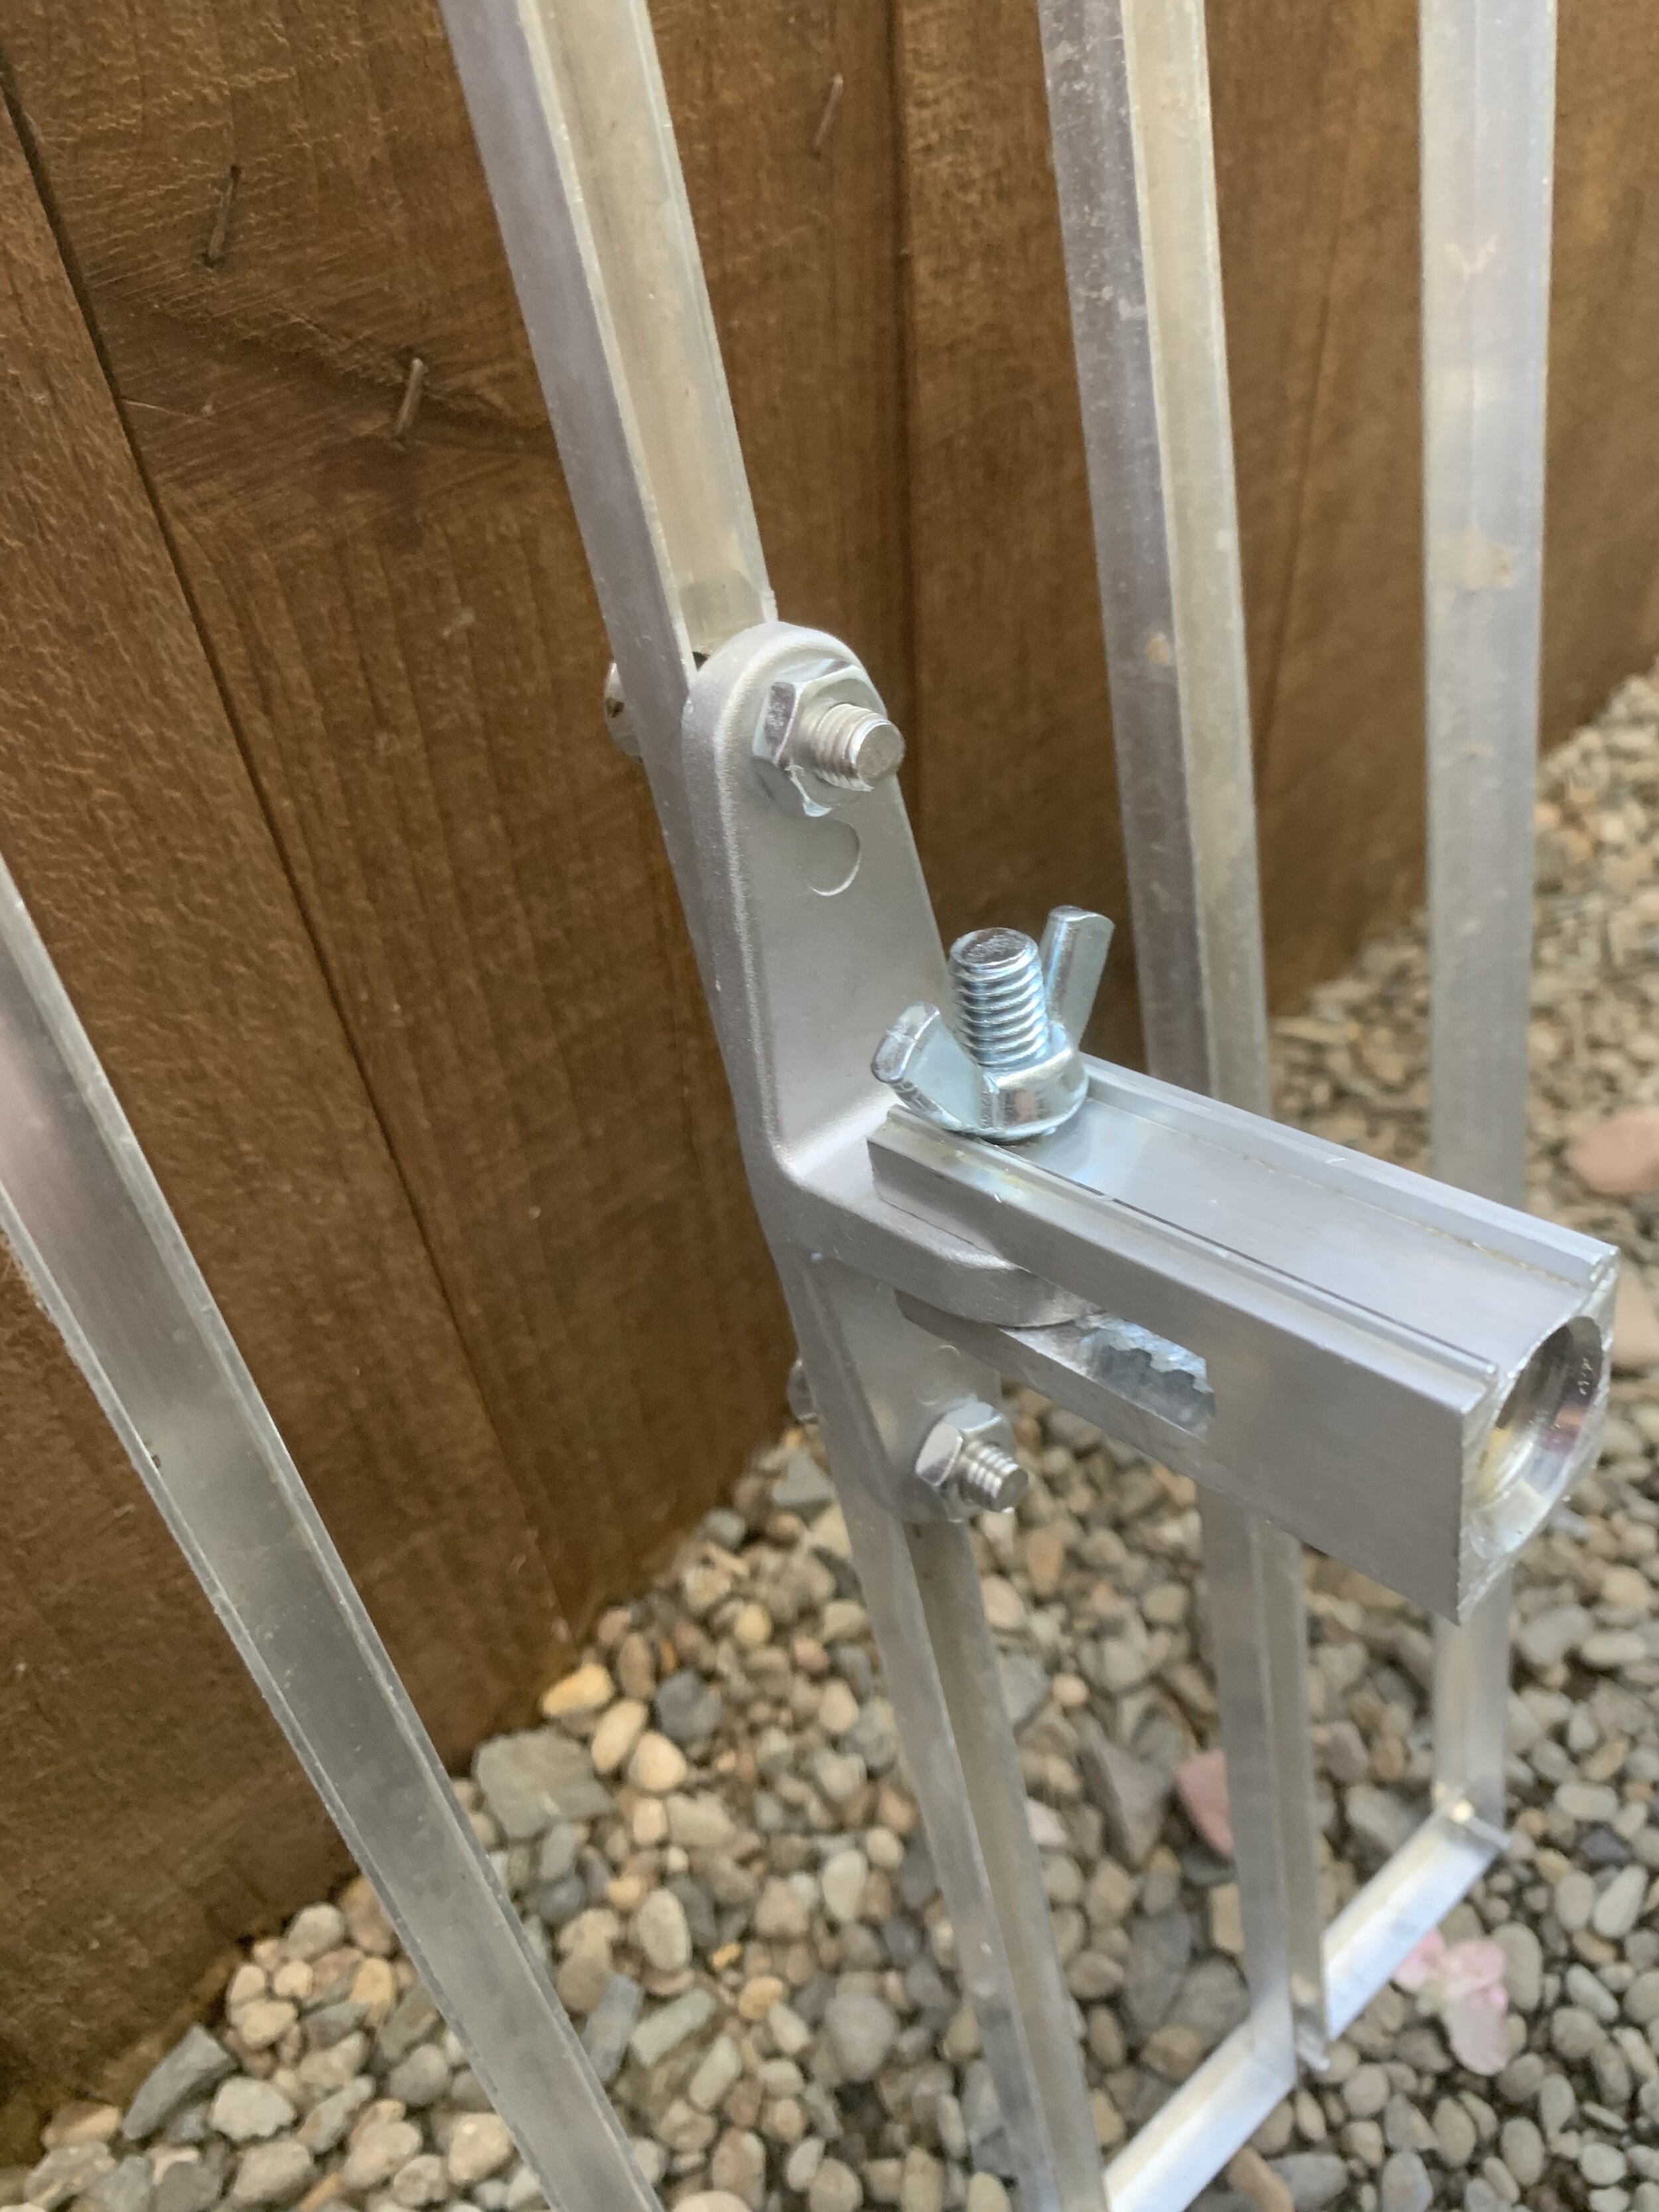
Note: This pictures were taken before I did a final assembly so I didn't have washers installed.
Tighten Down Bolts and Test
Making sure that the rake has no flex is important since this will be used to push dirt and soil around. Wiggle it around and test to see if anything is loose or if there is any flex. Tighten the bolts if necessary, once you start using the rake on dirt it's not as easy to re-tighten things because the hex holes get filled with dirt. Once everything is tighten down, attach your broom handle, throw down some dirt on your yard and push it with your rake. One thing I did notice is that if you have fairly long grass it does snag a bit so it's best to use this on your yard after you've mowed the grass a bit low. You should notice that the rake helps even out low spots fairly easy and levels out the dirt. I have even used this to level my pea gravel on my side yard and it worked out great, no flex and no issues with anything coming loose.
Conclusion
Making a Levelawn or Lawn Lute wasn't as super difficult and honestly I'm surprised at the fact that manufacturers can charge so much for such a simple to make tool. I get that the ones being sold are made of stainless steel but I don't see an issue with making it out of aluminum. I'm not an expert on the subject of metal and their durability but for a tool that I'll probably use maybe once or twice a year, I think I'm okay with it being made out of aluminum and I just can't justify the cost. All I had to really buy for this project was the aluminum pieces and bracket+broom adapter, so the cost was just around $50. Even if you bought everything in my materials list you'd still be saving money over buying a leveling rake online. If you want to save even more money, find the aluminum locally, buy just the amount of bolts, washers, and nuts you actually need and you can build a rake for less than I did.
There are a ton of other guides out there on how to make a leveling rake out of PVC, other kinds of metals, and even wood, but aesthetically I think that this looked the best and I hope this guide will help out anyone who doesn't want to spend $150, can't find a leveling rake in stock, or just prefer to build one themselves. Unless you own a golf course or you're constantly leveling your lawn for whatever reason.

Pushing sand and dirt around